

Welcome to this detailed step-by-step guide which talks about how to build a ramp for the shed and if you are truly interested in building a ramp for a shed then we advise that you pay close attention to every detail we would be giving out in this post.
One of the best ways that you can get the best results when building a ramp for a shed is by investing in high-quality materials and also working with close attention. A good example of a high-quality material used on building a ramp for a shed is the pressure treated, water-resistant lumber wood.
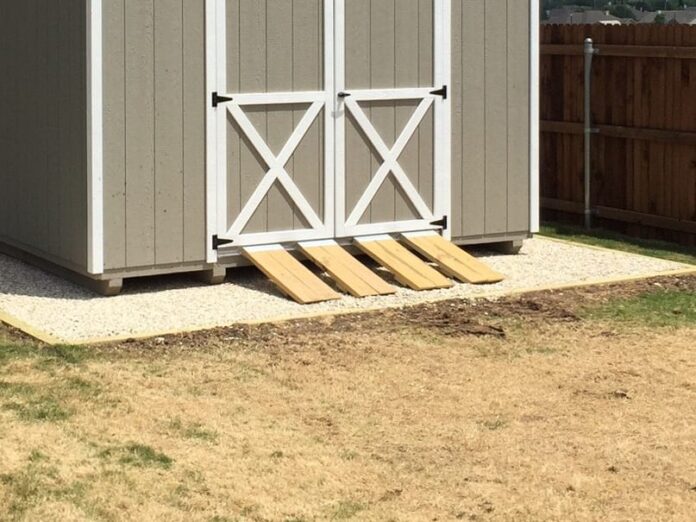
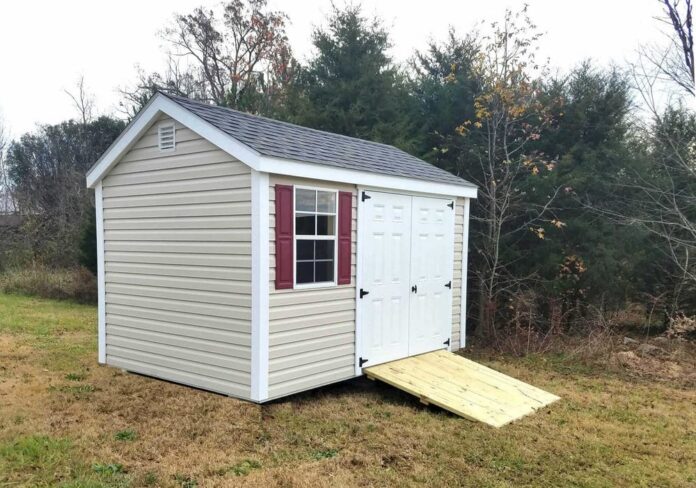
A ramp for a shed is of great use if you have a backyard and you want to gain easy and better access to your construction site or you want to push a cart around.
Ensuring that you have a proper and detailed plan guarantees that you would obtain exceptional results and have it at the back of your mind that you would need to adjust the slope and width of the ramp so it would be able to meet up with all of your needs. Furthermore, concrete needs to be added at the end of the joists.
This is because the concrete slab helps in providing support for the joists so the joists need to equally spaced so it can provide adequate support for the ramp shed. When it comes to designing a project for your backyard, there are lots of patterns and designs that you can actually select from.
What you need to do pay attention to a selected project that would suit your need so what you should do is check out some projects which would add extra value to your property.
Interesting Read – How To Cut Laminate Countertops
You can also talk to a friend to help you when it comes to building a ramp shed because you would need someone to help you hold other components together.
How To Build A Ramp For Shed
Materials:
The materials needed when it comes to building a ramp for the shed includes;
- 1 piece of 45 inches long 2×6 lumber wood for support
- 4 piece of 50 inches long 2×6 lumber wood for joists
- 9 pieces of 45 inches long 2×6 lumber wood for slats
- 2 pieces of 13 inches long 2×4 lumber wood for blockings
- 1 piece of 13 inches 2×6 lumber wood for blockings
Tools:
The tools you would need when you want to build a ramp for a shed in your backyard includes;
- Jigsaw
- Miter saw
- Glasses
- Safety gloves
- Drill bits
- Drill machinery
- Carpentry pencil
- Spirit level
- Tape measure
- Chalk line
Building Tips:
Several coats of wood stain should be applied to the wooden surfaces and you should also fill up holes using wood fillers before smoothing the surface.
The first step that you need to take when it comes to building a ramp for the shed is attaching the support to the exterior frame and also make sure that the support is properly cut to the right size and they are held in place using galvanized screws.
Before securing the support with screws, make sure that the support is placed in a horizontal position. Building a joist for the shed ramp is one of the easiest steps you would have to take but this is dependent on the type of saw you make use of and if you end up taking the right accurate measurement.
After making cuts, ensure that you smooth all the edges and also ensure that all the joists are build using the same method or manner. When you are done with building the joists, the next thing that you have to do is attach the joists to the support but if you want to create rigid joints, then you might want to consider making use of galvanized hangers.
Aligning all of the components and also ensuring that they are equally spaced is another way that would help you get the job done like a professional.
Trendy Post – How To Make Use Of A Planer
The next step involves your building blocks and placing them well secured between the joists and after that, go on to drill holes right through the joists before securing them using galvanized screws.
One thing that we want you to have at the back of your mind is if you work and pay attention then you are definitely going to get the best and professional results. The 2×6 decking should be attached to the support and this is also a straightforward process but still, you would need to work with great attention.
The decking slats should be attached to the joists from the top before moving to the bottom and pilot holes can also be drilled through the slats prior to inserting the screws.
However, you need to make sure that all of your slats are equally placed if you do not want to rip your woods apart and one way to keep slats equally placed is by placing a nail right in between them. Finally, the only thing left for you to is to make sure that you do not leave any finishing touching undone.
The finishing touches involve you filling up every hole using an effective wood filler and after that, you should allow it to dry out for some hours.
After it eventually dries up, the wooden surface should be made smooth and the way to achieve this is by making use of fine-grit sandpaper while the residues should be vacuumed so as to get rid of unwanted debris or dirt. One smart tip that we want to leave with you is that you should apply coats of paint or stain to your wooden components.
This is very important because it helps in fighting against decay as well as enhancing their look. If you are at this point then by now you shouldn’t have any more problems with constructing a ramp for a shed in your backyard and we would also appreciate if you can share this detailed article with your family and friends as it would come in handy when they want to construct a ramp for the shed in their backyard.
Related Post – How To Cut Vinyl Siding


